See this FAQ on what to do if you can’t see OGC layers displayed in ArcGIS Online.
Configure WMS in ArcGIS Online
Watch our OGC webinar, where you will learn how to integrate WMS with ArcGIS Online.
- Open ArcGIS Online.
- Login, or create an account, if you don't have one yet.
- Once logged in, click on Map in the top navigation bar.

- The world map opens. On the top left, click on
 , to open a dropdown menu. Select Add Layer from Web.
- An Add Layer from Web dialog opens. In the dropdown menu, An ArcGIS Server Web Service is preselected. Click on the dropdown menu to select A WMS OGC Service.

- Next, you need to paste the WMS endpoint with a configuration ID Into the URL box. To get it, go to the Configuration Utility and open the configuration you would like to display in ArcGIS Online.
- In the Configuration Utility, click on the dropdown menu on the left, which by default displays the ID. In the dropdown menu, choose WMS.
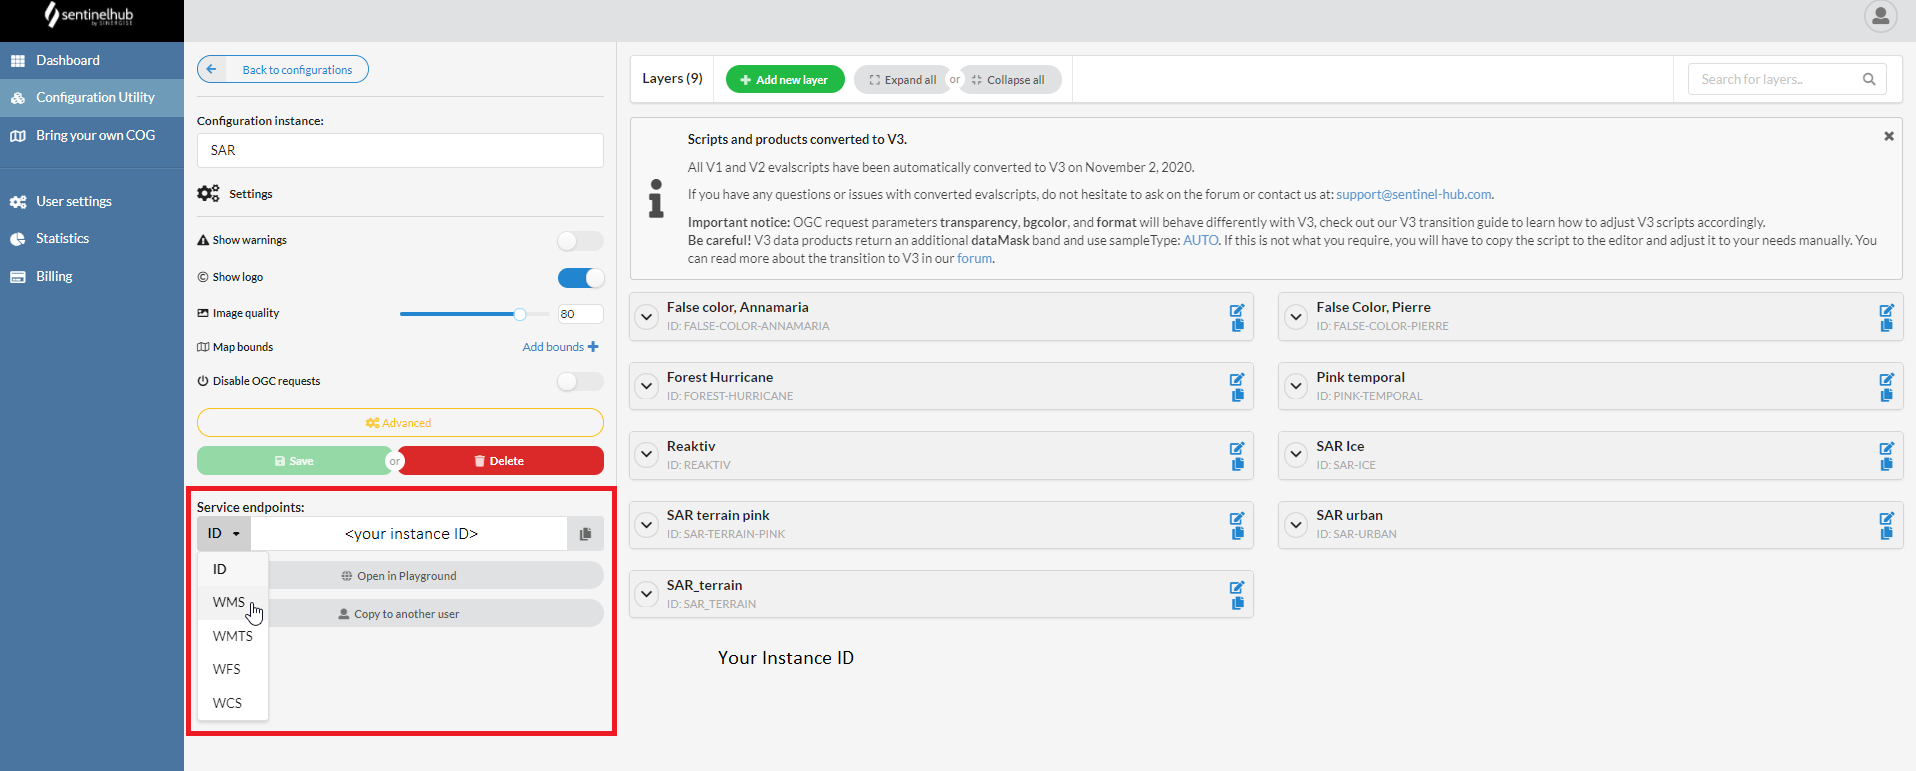
- Copy the link, that should look like
https://services.sentinel-hub.com/ogc/wms/ID, with ID being your instance ID.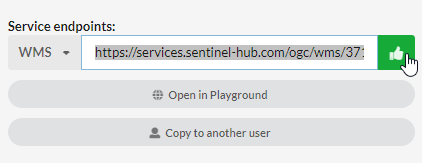
- Paste it into the URL window in ArcGIS Online dialog and click the GET LAYERS button.

- After you click the GET LAYERS button, all the available layers from your configuration will appear. You can select which ones you want to add to the map; by default, all are selected. When happy with the selection, click on the ADD LAYER button.

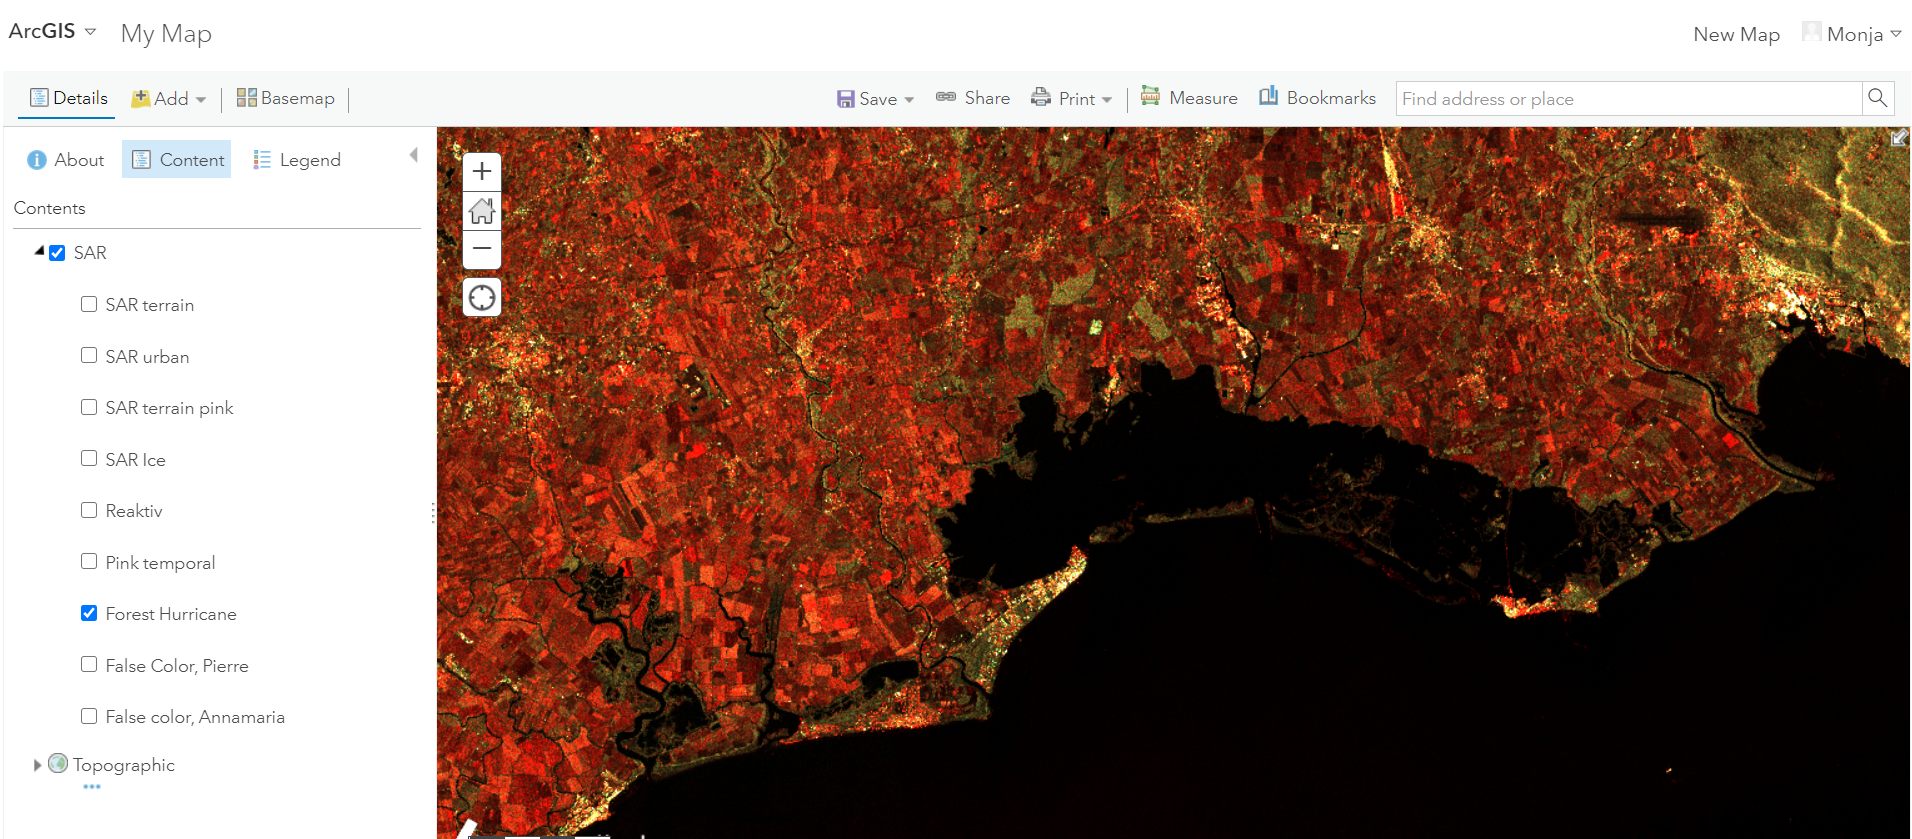
- Next, you will see the name of your configuration (in this case, SAR) in the Contents panel on the left. Click on the arrow next to it, to expand it and uncover the layers.

- Select the layer you're interested in and zoom in, to see the imagery. If you're not zoomed in enough, you won't be able to see your layers.