Configure WCS in ArcMap 10.4.1.
If you are not familiar with the OGC instances (WMS, WCS. WMTS, WFS), you can read the documentation here and watch our OGC webinar from the start to learn all about OGC in Sentinel Hub.
- Open ArcMap.
- Click on the Add Data icon.

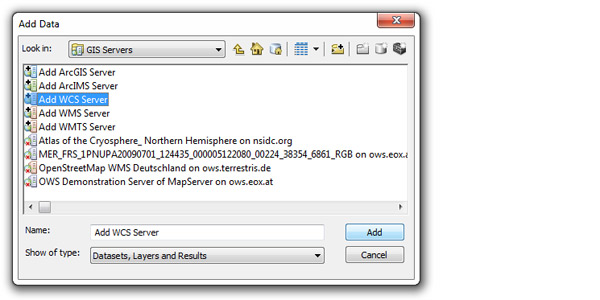
- Add data dialog opens. From dropdown list in the field Look in select GIS servers. From the list of various GIS servers types select Add WCS server. And click on the Add button.
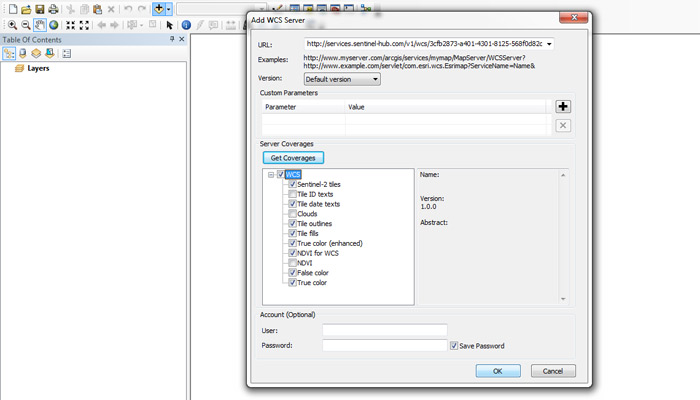
- Add WCS Server dialog opens. Choose version 1.0 and copy our URL, which was sent to you, in the field URL. If URL is valid, the button Get Coverages activates. Click on it and the list of all layers available in our WCS will be displayed in the window below the button. Click OK.
- Add WCS Server dialog closes. Our WCS shall now appear in the list of GIS servers. If the connection is not established successfully, its will be indicated with red cross on its icon. In this case, the previous steps shall be repeated. Select our WCS in the list and click on the Add button.
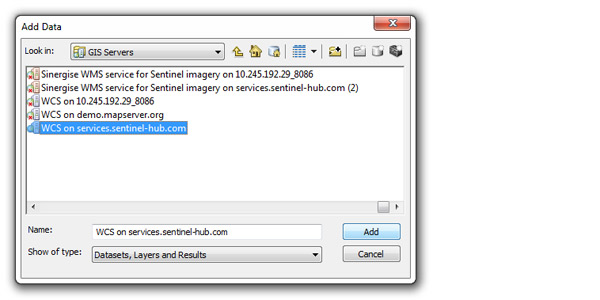
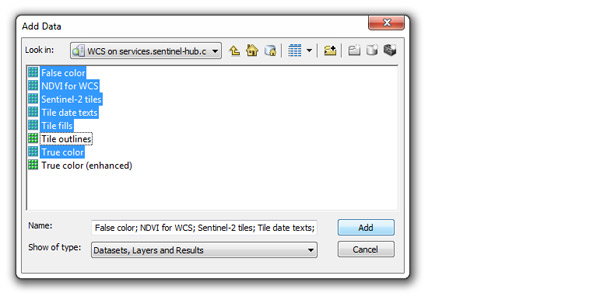
- The list of layers available via WCS appears in the Add data dialog. Select layers to be added to the map and click on the Add button.
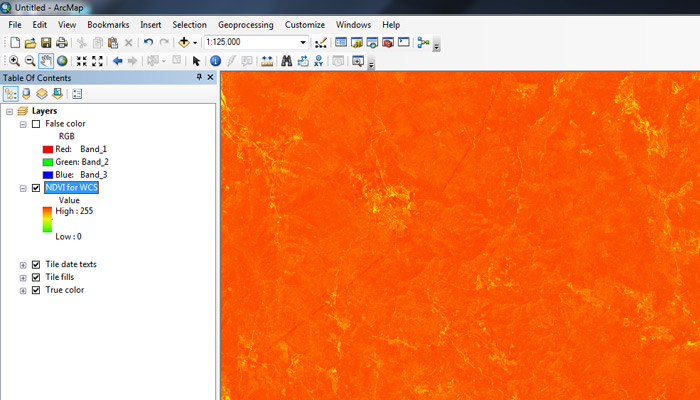
- All Sentinel layers available in our WCS shall be added to list of Layers in ArcMap. The content is not visible if the scale of the map is too small.
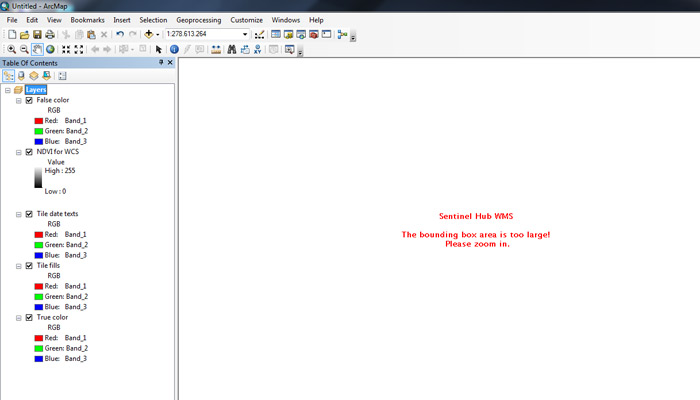
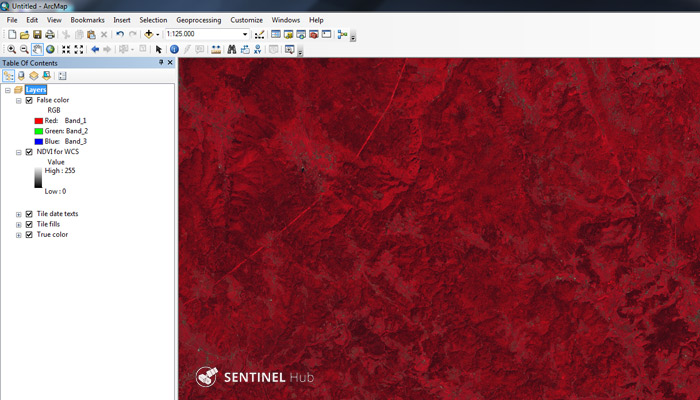
- Zoom in to the area of interest. Sentinel images shall now be visible.
- Identify function can be used to get the values of layers for selected pixel. Appearance of each layer can also be edited by defining its symbology as usual in ArcMap. Double click on the layer to open Layer properties dialog. Click Symbology tab and input appropriate settings. Click Ok.
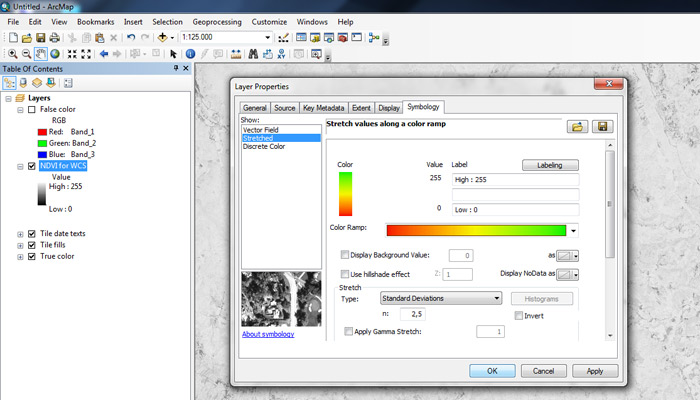
- Layer properties dialog closes and layer is displayed with customized symbology.