Integrate Sentinel Hub into ArcGIS Desktop using WMS.
If you are not familiar with the OGC instances (WMS, WCS. WMTS, WFS), you can read the documentation here and watch our OGC webinar from the start to learn all about OGC in Sentinel Hub.
- Open ArcMap.
- Click on the Add Data icon.

- Add data dialog opens. From dropdown list in the field Look in select GIS servers.
From the list of various GIS servers types select Add WMS server. And click on the Add button.
- Add WMS server dialog opens. Copy our URL, which was sent to you, in the field “URL”. If URL is
valid, the button Get Layers activates. Click on it and the list of all layers available in our WMS
shall be displayed in the window below the button. Click OK.
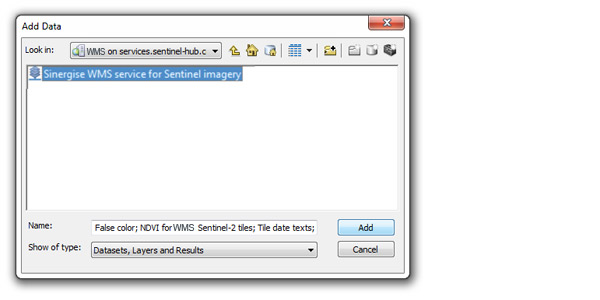
- Add WMS Server dialog closes. Our WMS shall now appear in the list of GIS servers. The icon next
to it shall not have red cross. Select our WMS in the list and click on the Add button.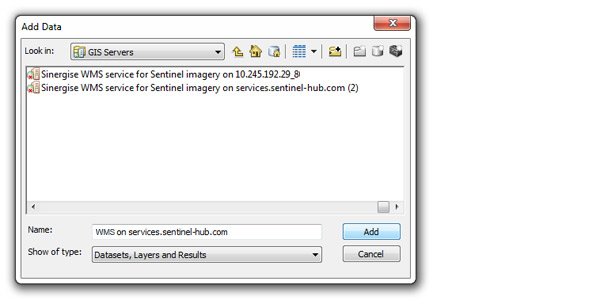
- Select our WMS again and click on the Add button.
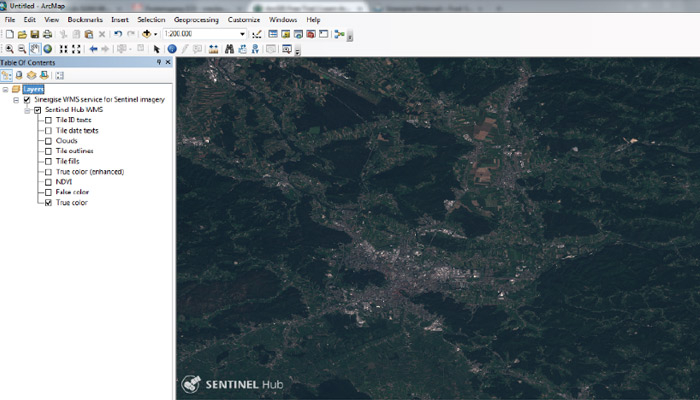
- All Sentinel layers available in our WMS shall be added to list of Layers in ArcMap. The content is not
visible if the scale of the map is too small.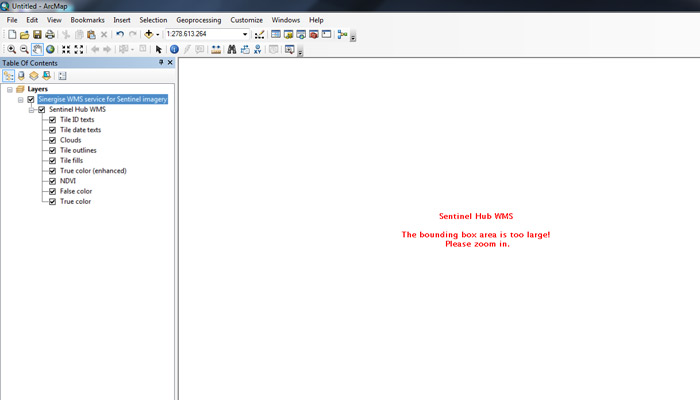
- Turn off all but one layer by unchecking the check boxes next to them. (In some cases ArcMap turns on all layers and calls WMS. Sentinel Hub WMS service does not support visualisation of many layers at the same time. We suggest you turn off all layers and turn them on one by one.) Continue with zooming in to the area of
interest. Sentinel images shall now be visible.